Your First Project: Pong! 🏓
This tutorial is written for people who are new to FlixelGDX, not
new to programming. If you have never written code before, we strongly
recommend spending an afternoon on the basics of Java or Kotlin
first — variables, classes, methods, if and for.
Anywhere is fine; some good free starting points (from W3Schools!):
You don't need to be an expert — just comfortable reading a simple class with a field, a constructor, and a method.
Which one should I pick?
While both work flawlessly, don't use Java if you:
- Are transitioning from HaxeFlixel.
- Want a cleaner, more concise language that is easier for game development beginners.
Because of this, Kotlin is an obvious choice, especially if you're coming from the Haxe ecosystem. When you combine FlixelGDX's simple, modular and backend-agnostic API with a simple, easy-to-use language, you will immediately fall in love with the ecosystem and have a lot of fun making games!
Hey there! In this tutorial, we're going to build the classic Pong game in FlixelGDX. You know the one — two paddles on either side of the screen, a tiny ball bouncing back and forth, and the first player to miss the ball loses.
Pong is a perfect first project. It is small enough to finish in one sitting, but along the way you will learn almost every important FlixelGDX idea:
- 🎬 Creating and handling sprites inside a state.
- 🔄 Switching states and opening a substate.
- 💥 Handling collision logic and a bit of basic math.
- ✍️ Using the text object system to show the score.
- 🎮 Handling input from the keyboard.
- ⏱ Working with elapsed / delta timing so your game feels the same on every computer.
- 📝 Using the logging API to peek at what your game is doing.
Every code block on this page has tabs for Java and Kotlin — the same two languages the project generator supports. Pick whichever matches the project you generated, and stick with it for the whole tutorial.
A quick mental model
Before we type a single line of code, let's set up a little picture in your head.
Think of your game like a TV show.
- The
FlixelGameis the TV itself — it stays on the whole time. - A
FlixelStateis an episode — a self-contained scene like the main menu, the gameplay, or the credits. - A
FlixelSubStateis a commercial break — it pauses what is on screen, plays a little extra scene (a pause menu, a "GAME OVER" message), then hands control back when it is done. - Each
FlixelSpriteis an actor in the current episode — the ball, a paddle, a score number. Flixel(capital F) is the remote control — it lets us say switch the channel (Flixel.switchState), listen to the microphone (Flixel.keys), or talk on the studio intercom (Flixel.info).
Easy, right? Let's build the show.
0. Install a JDK
Pick the JDK you want and follow the snippet for your operating system. For FlixelGDX we recommend Eclipse Temurin (Adoptium) HotSpot — it is what most libGDX and game-development material assumes, works well with Gradle toolchains, and gets timely security updates through Adoptium.
Eclipse Temurin (Adoptium) on Windows: Use the official MSI installer from Adoptium.
- Tick "Set JAVA_HOME" and "Add to PATH" during the install wizard.
If you would rather use GraalVM, Amazon Corretto or Azul Zulu, head to the project generator — picking a vendor there will show you the matching install instructions for every OS.
1. Generate the project
Head to the project generator and generate a project with these settings:
- Game name:
Pong - Game id:
pong - Package name:
com.example.pong(or your own, i.e.io.yourusername.yourgame) - Template: Blank play state
- Platforms: Desktop
- Language: Java (or Kotlin — your choice)
- JDK vendor: Eclipse Temurin (recommended) (or GraalVM, Corretto, Zulu)
Download the zip, unzip it, and run:
./gradlew :lwjgl3:run
(Use gradlew.bat :lwjgl3:run on Windows.)
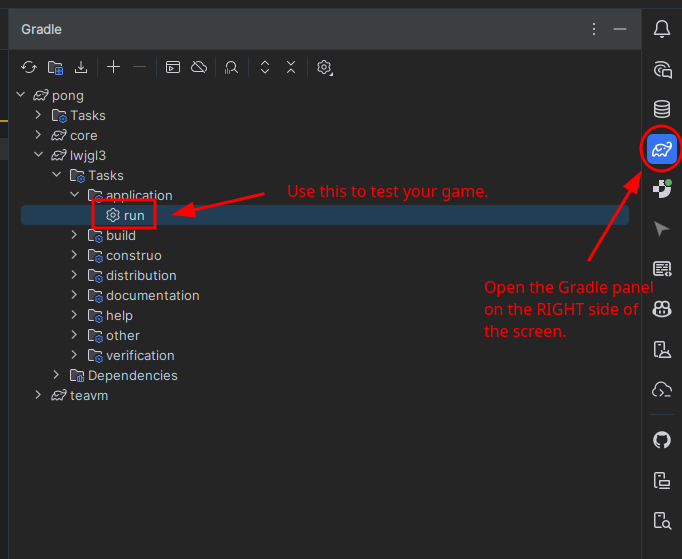
If you're using IntelliJ IDEA, you don't have to run the command
manually! On the right side (shown in the image below), all of the Gradle tasks are clickable buttons!
You can do this by opening the Gradle panel shown below, opening the lwjgl3/application group, and execute
the run task.
That is it — no gradle wrapper, no installer prompts. The zip already
ships with the Gradle wrapper, and Gradle will auto-download the
matching JDK toolchain on the first build via the Foojay Toolchains
Resolver. After a brief first-time download you should see the empty
640×480 window!
If you take a peep inside the core folder, you'll find two files were made for you:
PongGame.java(or.kt) — theFlixelGamesubclass. It's where the heart of the game loop lives. If you're coming from HaxeFlixel, this is the same equivalent ofMain.hx, except instead of extending an OpenFL sprite and adding anFlxGameas a child display object, FlixelGDX has you extendFlixelGamedirectly and pass it to a platform launcher.PlayState.java(or.kt) — the empty state we are about to fill in. This is the "episode" of our game where the Pong action happens!
It also dropped an .editorconfig at the root of the project. Most
IDEs (IntelliJ IDEA, Eclipse, VS Code, …) pick that up automatically —
it pins our indentation to 2 spaces and the line ending to LF so
the code you write on your machine looks the same as the code you read
in this tutorial. If you ever want to change those rules, just edit the
file.
We will edit only PlayState and add one tiny extra file later.
2. Make some paddles
The first thing every Pong game needs is two paddles — one for the
player on the left, one for the enemy on the right. In FlixelGDX, the
quickest way to draw a colored rectangle on screen is the built-in
makeGraphic helper on FlixelSprite.
makeGraphic(width, height, color) is like saying:
"Hey FlixelGDX, hand me a blank piece of paper this big, painted in
this color." You can swap that for a real image later, but for now
colored rectangles are perfect.
Open PlayState and replace the body with:
- Java
- Kotlin
package com.example.pong;

import org.flixelgdx.Flixel;
import org.flixelgdx.FlixelSprite;
import org.flixelgdx.FlixelState;
import org.flixelgdx.util.FlixelColor;

public class PlayState extends FlixelState {

  // Two paddles. We keep them as fields so we can use them every frame.
  private FlixelSprite player;
  private FlixelSprite enemy;

  @Override
  public void create() {
    super.create();
    Flixel.info("Pong is starting!");

    // Left paddle. This is the human player.
    player = new FlixelSprite(20, 200);
    player.makeGraphic(8, 64, FlixelColor.WHITE);
    add(player);

    // Right paddle. This is the enemy AI we'll code later!
    enemy = new FlixelSprite(612, 200);
    enemy.makeGraphic(8, 64, FlixelColor.WHITE);
    add(enemy);
  }
}
package com.example.pong

import org.flixelgdx.Flixel
import org.flixelgdx.FlixelSprite
import org.flixelgdx.FlixelState
import org.flixelgdx.util.FlixelColor

class PlayState : FlixelState() {

  // Two paddles. We keep them as fields so we can use them every frame.
  private lateinit var player: FlixelSprite
  private lateinit var enemy: FlixelSprite

  override fun create() {
    super.create()
    Flixel.info("Pong is starting!")

    // Left paddle. This is the human player.
    player = FlixelSprite(20f, 200f).apply {
      makeGraphic(8, 64, FlixelColor.WHITE)
    }
    add(player)

    // Right paddle. This is the enemy AI we'll code later!
    enemy = FlixelSprite(612f, 200f).apply {
      makeGraphic(8, 64, FlixelColor.WHITE)
    }
    add(enemy)
  }
}
What just happened?
create()is the method FlixelGDX calls when your state first appears. Think of it as the set-up scene of the episode.new FlixelSprite(x, y)creates an actor at a position. The numbers are thex/yof the sprite's bottom-left (not top-left like HaxeFlixel!) corner in world space (as documented onFlixelObjectin the API reference).makeGraphic(8, 64, FlixelColor.WHITE)paints a tall thin white rectangle.FlixelColoris FlixelGDX's color utility (org.flixelgdx.util.FlixelColor). It ships named constants such asFlixelColor.WHITE,FlixelColor.RED, and many more. You can also pass a libGDXColordirectly if you need a custom hex value.add(player)tells the state "please include this actor when you update and draw the scene each frame".
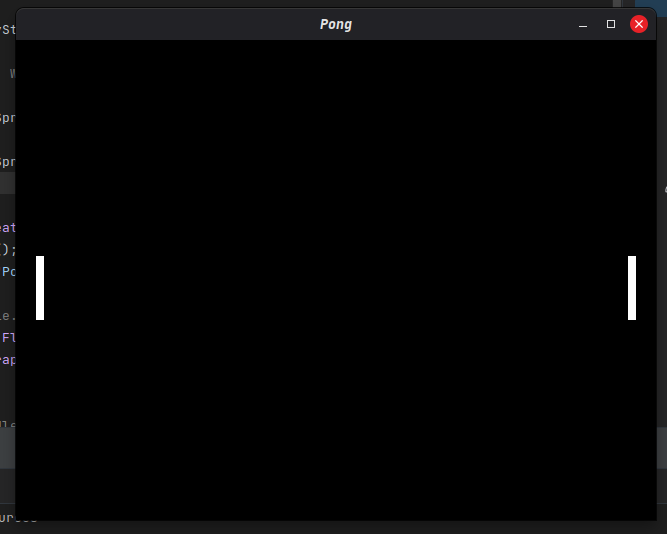
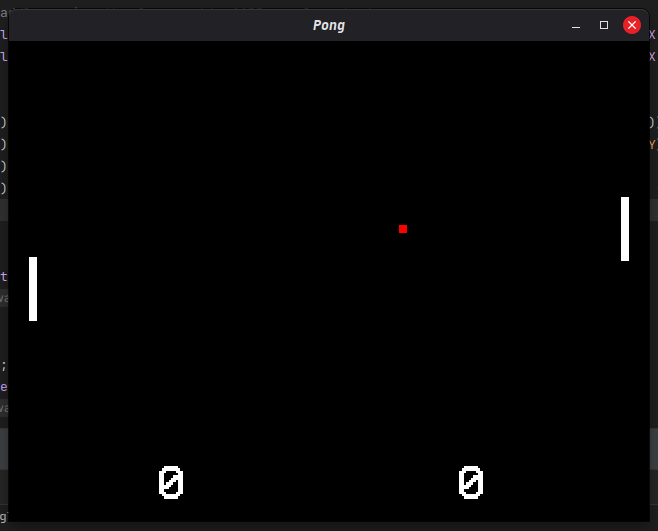
Run the game (./gradlew :lwjgl3:run), and you should see two white paddles on either side of the screen.
Pong is starting to take shape!
3. Move the player paddle with the keyboard
Right now both paddles are statues. Let's teach the left one to listen
to W (up) and S (down). FlixelGDX's input lives on Flixel.keys,
and every state has an update(float elapsed) method that runs once per
frame.
update(elapsed) is the director shouting "ACTION!"
every frame. The elapsed parameter is how many seconds passed since
the last shout — usually a tiny number like 0.016. We multiply our
speed by elapsed so the game feels the same on a slow laptop and a
fast desktop. That is what people mean by delta time.
Add the update method below create:
- Java
- Kotlin
import org.flixelgdx.input.keyboard.FlixelKey;

// ...inside PlayState

private static final float PADDLE_SPEED = 220f;

@Override
public void update(float elapsed) {
  super.update(elapsed);

  if (Flixel.keys.pressed(FlixelKey.W)) player.changeY(PADDLE_SPEED * elapsed);
  if (Flixel.keys.pressed(FlixelKey.S)) player.changeY(-PADDLE_SPEED * elapsed);

  // Don't let the paddle leave the screen.
  if (player.getY() < 0) player.setY(0);
  if (player.getY() > Flixel.getViewHeight() - player.getHeight()) player.setY(Flixel.getViewHeight() - player.getHeight());
}
import org.flixelgdx.input.keyboard.FlixelKey

// ...inside PlayState

companion object {
  private const val PADDLE_SPEED = 220f
}

override fun update(elapsed: Float) {
  super.update(elapsed)

  if (Flixel.keys.pressed(FlixelKey.W)) player.y += PADDLE_SPEED * elapsed
  if (Flixel.keys.pressed(FlixelKey.S)) player.y -= PADDLE_SPEED * elapsed

  // Don't let the paddle leave the screen.
  if (player.y < 0f) player.y = 0f
  if (player.y > Flixel.getViewHeight().toFloat() - player.height) player.y = Flixel.getViewHeight().toFloat() - player.height
}
Key idea: pressed returns true while the key is being held.
There is also justPressed (true for one frame only, the frame the
key went down) which we will use in a moment.
Show the full file
- Java
- Kotlin
package com.example.pong;

import org.flixelgdx.Flixel;
import org.flixelgdx.FlixelSprite;
import org.flixelgdx.FlixelState;
import org.flixelgdx.input.keyboard.FlixelKey;
import org.flixelgdx.util.FlixelColor;

public class PlayState extends FlixelState {

  private static final float PADDLE_SPEED = 220f;

  private FlixelSprite player;
  private FlixelSprite enemy;

  @Override
  public void create() {
    super.create();
    Flixel.info("Pong is starting!");

    // Left paddle. This is the human player.
    player = new FlixelSprite(20, 200);
    player.makeGraphic(8, 64, FlixelColor.WHITE);
    add(player);

    // Right paddle. This is the enemy AI we'll code later!
    enemy = new FlixelSprite(612, 200);
    enemy.makeGraphic(8, 64, FlixelColor.WHITE);
    add(enemy);
  }

  @Override
  public void update(float elapsed) {
    super.update(elapsed);

    if (Flixel.keys.pressed(FlixelKey.W)) player.changeY(PADDLE_SPEED * elapsed);
    if (Flixel.keys.pressed(FlixelKey.S)) player.changeY(-PADDLE_SPEED * elapsed);

    // Don't let the paddle leave the screen.
    if (player.getY() < 0) player.setY(0);
    if (player.getY() > Flixel.getViewHeight() - player.getHeight()) player.setY(Flixel.getViewHeight() - player.getHeight());
  }
}
package com.example.pong

import org.flixelgdx.Flixel
import org.flixelgdx.FlixelSprite
import org.flixelgdx.FlixelState
import org.flixelgdx.input.keyboard.FlixelKey
import org.flixelgdx.util.FlixelColor

class PlayState : FlixelState() {

  companion object {
    private const val PADDLE_SPEED = 220f
  }

  private lateinit var player: FlixelSprite
  private lateinit var enemy: FlixelSprite

  override fun create() {
    super.create()
    Flixel.info("Pong is starting!")

    // Left paddle. This is the human player.
    player = FlixelSprite(20f, 200f).apply {
      makeGraphic(8, 64, FlixelColor.WHITE)
    }
    add(player)

    // Right paddle. This is the enemy AI we'll code later!
    enemy = FlixelSprite(612f, 200f).apply {
      makeGraphic(8, 64, FlixelColor.WHITE)
    }
    add(enemy)
  }

  override fun update(elapsed: Float) {
    super.update(elapsed)

    if (Flixel.keys.pressed(FlixelKey.W)) player.y += PADDLE_SPEED * elapsed
    if (Flixel.keys.pressed(FlixelKey.S)) player.y -= PADDLE_SPEED * elapsed

    if (player.y < 0f) player.y = 0f
    if (player.y > Flixel.getViewHeight().toFloat() - player.height) player.y = Flixel.getViewHeight().toFloat() - player.height
  }
}
4. Add the ball, with collision
Now the fun part — a bouncing ball. FlixelObject already has built-in velocity fields
(velocityX, velocityY) that the framework applies to position automatically every frame,
so we do not need to move the ball manually.
FlixelObject.velocityX/Y store "how many pixels per second to move". FlixelGDX
multiplies by delta time and updates the position for you — the same delta-time math
as the paddle, but handled by the framework instead of by hand.
Add the ball, set its starting velocity, and add the bounce and collision checks:
- Java
- Kotlin
private FlixelSprite ball;
Inside create(), after the paddles:
ball = new FlixelSprite(316, 236);
ball.makeGraphic(8, 8, FlixelColor.RED);
ball.setVelocity(300f, 180f);
add(ball);
Inside update(elapsed), after the paddle clamps:
// Bounce off top/bottom.
if (ball.getY() < 0) {
  ball.setY(0);
  ball.setVelocityY(-ball.getVelocityY());
}
if (ball.getY() > Flixel.getViewHeight() - ball.getHeight()) {
  ball.setY(Flixel.getViewHeight() - ball.getHeight());
  ball.setVelocityY(-ball.getVelocityY());
}

// Bounce off paddles using the framework's AABB overlap check.
if (Flixel.overlap(ball, player) && ball.getVelocityX() < 0) ball.setVelocityX(-ball.getVelocityX());
if (Flixel.overlap(ball, enemy)  && ball.getVelocityX() > 0) ball.setVelocityX(-ball.getVelocityX());
private lateinit var ball: FlixelSprite
Inside create(), after the paddles:
ball = FlixelSprite(316f, 236f).apply {
  makeGraphic(8, 8, FlixelColor.RED)
  setVelocity(300f, 180f)
}
add(ball)
Inside update(elapsed), after the paddle clamps:
// Bounce off top/bottom.
if (ball.y < 0f) {
  ball.y = 0f
  ball.velocityY = -ball.velocityY
}
if (ball.y > Flixel.getViewHeight().toFloat() - ball.height) {
  ball.y = Flixel.getViewHeight().toFloat() - ball.height
  ball.velocityY = -ball.velocityY
}

// Bounce off paddles using the framework's AABB overlap check.
if (Flixel.overlap(ball, player) && ball.velocityX < 0) ball.velocityX = -ball.velocityX
if (Flixel.overlap(ball, enemy)  && ball.velocityX > 0) ball.velocityX = -ball.velocityX
Flixel.overlap runs the same AABB ("axis-aligned bounding box") check
you would write by hand — "do these two rectangles touch?" — but it
also quietly handles edge cases like sprites that have been kill()ed or
have exists == false, so your collision code stays one line.
Bonus: when you want to handle a whole group of things, take a look at the top-level
Flixel.overlapandFlixel.collidehelpers. Those let you pass groups, get callbacks per pair, and even auto-separate the colliders.
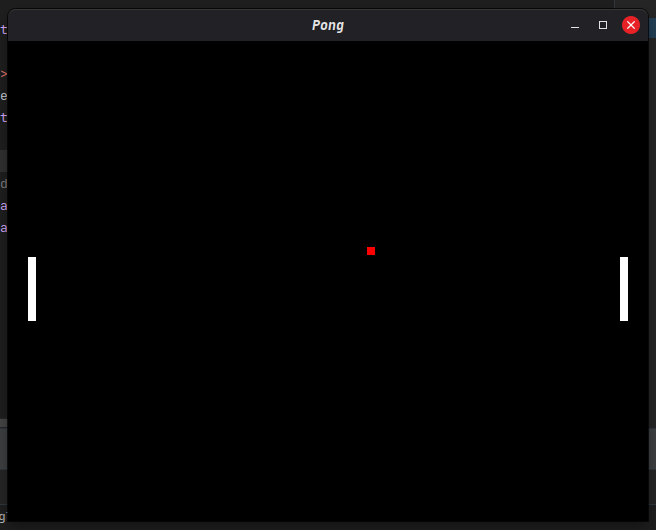
Run the game. A red ball appears on the screen. 🟥
5. Give the enemy a brain
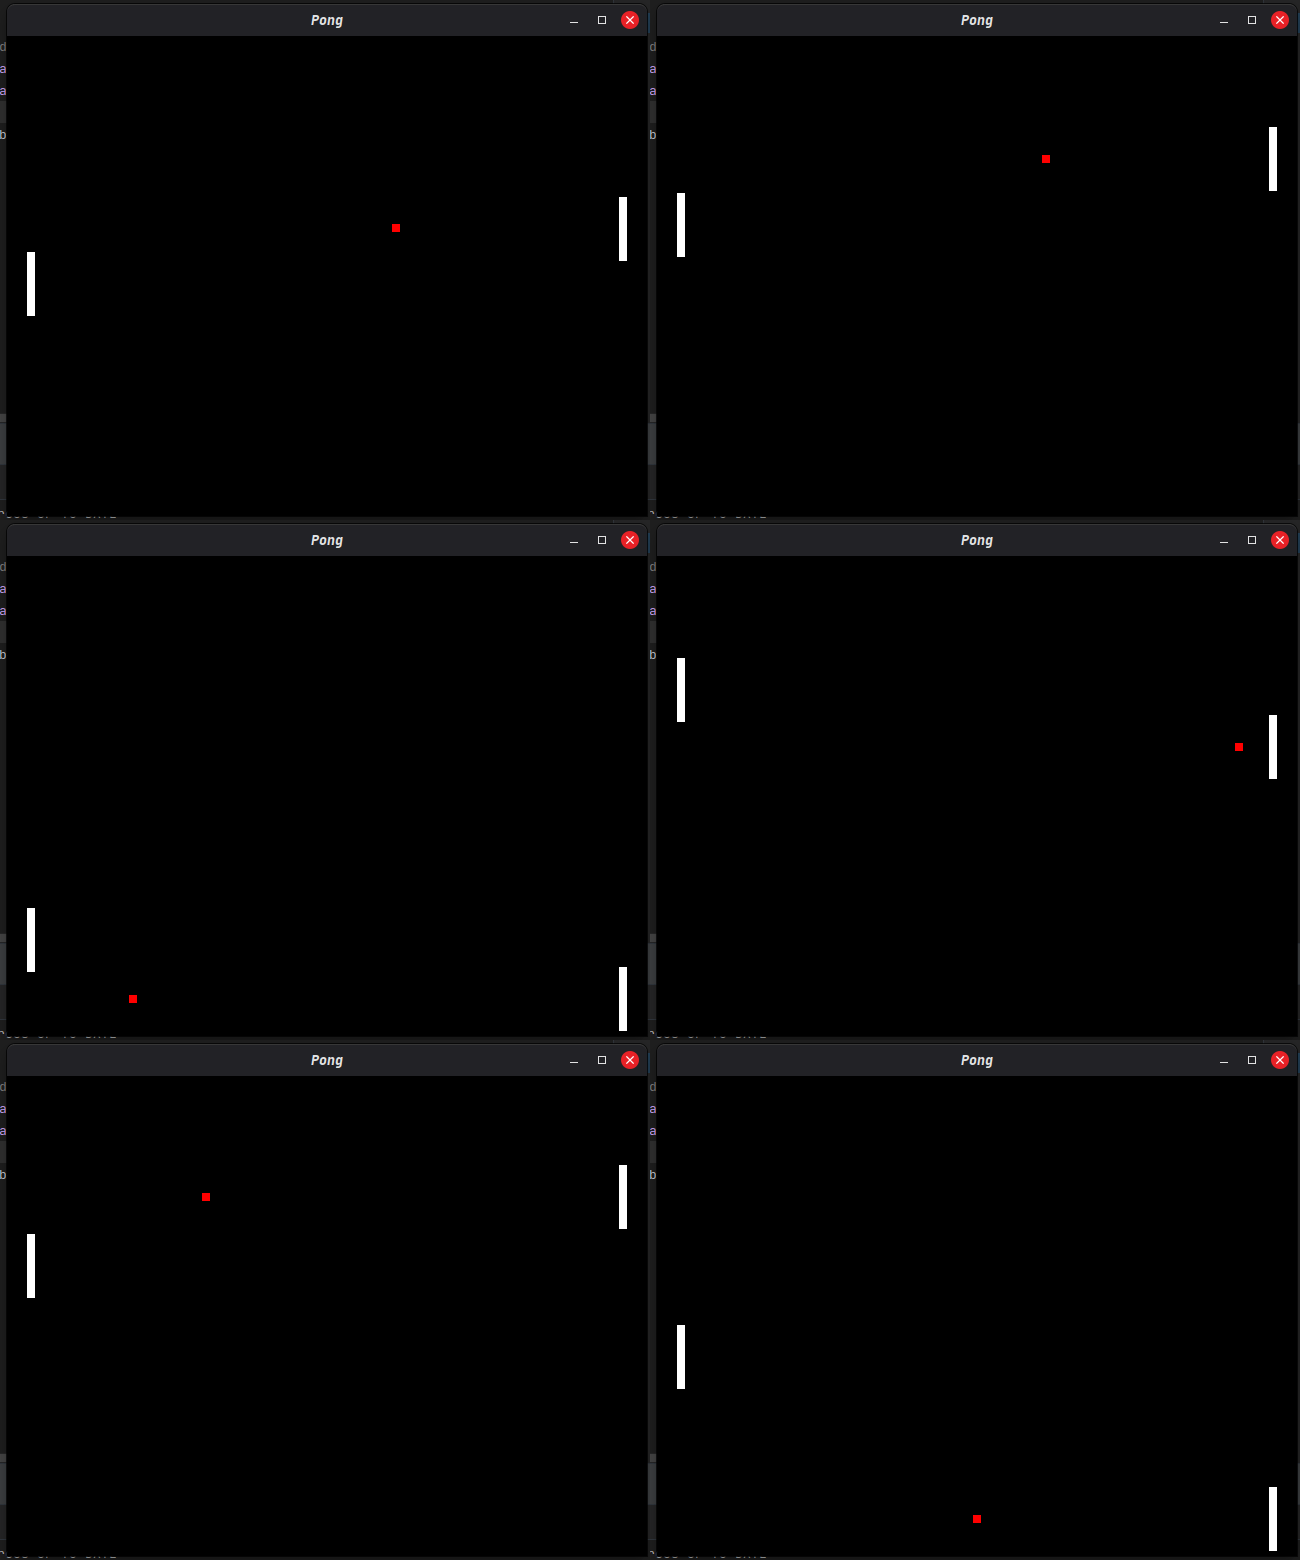
The enemy paddle should track the ball — but slowly enough that you can beat it. We just slide it toward the ball's vertical center each frame:
- Java
- Kotlin
private static final float ENEMY_SPEED = 160f;

// inside update(elapsed):
float targetY = ball.getY() - 28; // 28 = half-paddle minus half-ball
if (enemy.getY() < targetY) enemy.changeY(Math.min(ENEMY_SPEED * elapsed, targetY - enemy.getY()));
if (enemy.getY() > targetY) enemy.changeY(-Math.min(ENEMY_SPEED * elapsed, enemy.getY() - targetY));
if (enemy.getY() < 0) enemy.setY(0);
if (enemy.getY() > Flixel.getViewHeight() - enemy.getHeight()) enemy.setY(Flixel.getViewHeight() - enemy.getHeight());
companion object {
  private const val ENEMY_SPEED = 160f
}

// inside update(elapsed):
val targetY = ball.y - 28f // 28 = half-paddle minus half-ball
if (enemy.y < targetY) enemy.y += minOf(ENEMY_SPEED * elapsed, targetY - enemy.y)
if (enemy.y > targetY) enemy.y -= minOf(ENEMY_SPEED * elapsed, enemy.y - targetY)
if (enemy.y < 0f) enemy.y = 0f
if (enemy.y > Flixel.getViewHeight().toFloat() - enemy.height) enemy.y = Flixel.getViewHeight().toFloat() - enemy.height
Math.min(a, b) keeps us from overshooting the ball when it is close —
nicer than a wobbly tracker.
Show the full file
- Java
- Kotlin
package com.example.pong;

import org.flixelgdx.Flixel;
import org.flixelgdx.FlixelSprite;
import org.flixelgdx.FlixelState;
import org.flixelgdx.input.keyboard.FlixelKey;
import org.flixelgdx.util.FlixelColor;

public class PlayState extends FlixelState {
  private static final float PADDLE_SPEED = 220f;
  private static final float ENEMY_SPEED  = 160f;

  private FlixelSprite player;
  private FlixelSprite enemy;
  private FlixelSprite ball;

  @Override
  public void create() {
    super.create();
    Flixel.info("Pong is starting!");

    // Left paddle. This is the human player.
    player = new FlixelSprite(20, 200);
    player.makeGraphic(8, 64, FlixelColor.WHITE);
    add(player);

    // Right paddle. This is the enemy AI we'll code later!
    enemy = new FlixelSprite(612, 200);
    enemy.makeGraphic(8, 64, FlixelColor.WHITE);
    add(enemy);

    ball = new FlixelSprite(316, 236);
    ball.makeGraphic(8, 8, FlixelColor.RED);
    ball.setVelocity(300f, 180f);
    add(ball);
  }

  @Override
  public void update(float elapsed) {
    super.update(elapsed);

    if (Flixel.keys.pressed(FlixelKey.W)) player.changeY(PADDLE_SPEED * elapsed);
    if (Flixel.keys.pressed(FlixelKey.S)) player.changeY(-PADDLE_SPEED * elapsed);
    if (player.getY() < 0) player.setY(0);
    if (player.getY() > Flixel.getViewHeight() - player.getHeight()) player.setY(Flixel.getViewHeight() - player.getHeight());

    // Bounce off top/bottom.
    if (ball.getY() < 0) {
      ball.setY(0);
      ball.setVelocityY(-ball.getVelocityY());
    }
    if (ball.getY() > Flixel.getViewHeight() - ball.getHeight()) {
      ball.setY(Flixel.getViewHeight() - ball.getHeight());
      ball.setVelocityY(-ball.getVelocityY());
    }

    // Bounce off paddles using the framework's AABB overlap check.
    if (Flixel.overlap(ball, player) && ball.getVelocityX() < 0) ball.setVelocityX(-ball.getVelocityX());
    if (Flixel.overlap(ball, enemy)  && ball.getVelocityX() > 0) ball.setVelocityX(-ball.getVelocityX());

    float targetY = ball.getY() - 28;
    if (enemy.getY() < targetY) enemy.changeY(Math.min(ENEMY_SPEED * elapsed, targetY - enemy.getY()));
    if (enemy.getY() > targetY) enemy.changeY(-Math.min(ENEMY_SPEED * elapsed, enemy.getY() - targetY));
    if (enemy.getY() < 0) enemy.setY(0);
    if (enemy.getY() > Flixel.getViewHeight() - enemy.getHeight()) enemy.setY(Flixel.getViewHeight() - enemy.getHeight());
  }
}
package com.example.pong

import org.flixelgdx.Flixel
import org.flixelgdx.FlixelSprite
import org.flixelgdx.FlixelState
import org.flixelgdx.input.keyboard.FlixelKey
import org.flixelgdx.util.FlixelColor

class PlayState : FlixelState() {
  companion object {
    private const val PADDLE_SPEED = 220f
    private const val ENEMY_SPEED  = 160f
  }

  private lateinit var player: FlixelSprite
  private lateinit var enemy: FlixelSprite
  private lateinit var ball: FlixelSprite

  override fun create() {
    super.create()
    Flixel.info("Pong is starting!")

    // Left paddle. This is the human player.
    player = FlixelSprite(20f, 200f).apply { makeGraphic(8, 64, FlixelColor.WHITE) }
    add(player)

    // Right paddle. This is the enemy AI we'll code later!
    enemy = FlixelSprite(612f, 200f).apply { makeGraphic(8, 64, FlixelColor.WHITE) }
    add(enemy)

    ball = FlixelSprite(316f, 236f).apply {
      makeGraphic(8, 8, FlixelColor.RED)
      setVelocity(300f, 180f)
    }
    add(ball)
  }

  override fun update(elapsed: Float) {
    super.update(elapsed)

    if (Flixel.keys.pressed(FlixelKey.W)) player.y += PADDLE_SPEED * elapsed
    if (Flixel.keys.pressed(FlixelKey.S)) player.y -= PADDLE_SPEED * elapsed
    if (player.y < 0f) player.y = 0f
    if (player.y > Flixel.getViewHeight().toFloat() - player.height) player.y = Flixel.getViewHeight().toFloat() - player.height

    // Bounce off top/bottom.
    if (ball.y < 0f) {
      ball.y = 0f
      ball.velocityY = -ball.velocityY
    }
    if (ball.y > Flixel.getViewHeight().toFloat() - ball.height) {
      ball.y = Flixel.getViewHeight().toFloat() - ball.height
      ball.velocityY = -ball.velocityY
    }

    // Bounce off paddles using the framework's AABB overlap check.
    if (Flixel.overlap(ball, player) && ball.velocityX < 0) ball.velocityX = -ball.velocityX
    if (Flixel.overlap(ball, enemy)  && ball.velocityX > 0) ball.velocityX = -ball.velocityX

    val targetY = ball.y - 28f
    if (enemy.y < targetY) enemy.y += minOf(ENEMY_SPEED * elapsed, targetY - enemy.y)
    if (enemy.y > targetY) enemy.y -= minOf(ENEMY_SPEED * elapsed, enemy.y - targetY)
    if (enemy.y < 0f) enemy.y = 0f
    if (enemy.y > Flixel.getViewHeight().toFloat() - enemy.height) enemy.y = Flixel.getViewHeight().toFloat() - enemy.height
  }
}
6. Score! — using FlixelText
A Pong game with no score is just an animation. Let's add two big white
numbers at the top using FlixelText, the framework's text widget.
Think of FlixelText as a sprite with words on it.
It behaves like any other sprite — you add() it, you move it, you
tweak its text whenever the score changes.
Loading a custom font
The default font works fine for quick tests. For a proper retro Pong look let's
load a real TrueType font using FlixelFontRegistry — FlixelGDX's global font
manager. Registering a font once lets every FlixelText in your game reuse the same
loaded file instead of each object opening it independently.
1. Download the font
Download the VCR OSD Mono font, a chunky retro monospace typeface that fits right at home on an arcade score display.
2. Place it in your project
Inside your project folder open the assets/ directory and create a fonts/
subfolder inside it. Drag the downloaded file there:
my-pong-game/
  assets/
    fonts/
      vcr.ttf   <-- goes here
3. Register the font at startup
Open PlayState.create() and add these two lines at the very top, before any
FlixelText objects are created. The first line registers the .ttf file under
the short ID "vcr". The second makes it the game-wide default so any FlixelText
you forget to configure still uses it instead of the plain built-in font.
- Java
- Kotlin
import com.badlogic.gdx.Gdx;
import org.flixelgdx.text.FlixelFontRegistry;

// At the top of create(), before any FlixelText:
FlixelFontRegistry.register("vcr", Gdx.files.internal("fonts/vcr.ttf"));
FlixelFontRegistry.setDefault("vcr");
import com.badlogic.gdx.Gdx
import org.flixelgdx.text.FlixelFontRegistry

// At the top of create(), before any FlixelText:
FlixelFontRegistry.register("vcr", Gdx.files.internal("fonts/vcr.ttf"))
FlixelFontRegistry.setDefault("vcr")
Gdx.files.internal(path) resolves any path relative to the assets/ folder, which
is where libGDX (and by extension FlixelGDX) looks for game assets.
Now every FlixelText in the game will automatically use the VCR font unless you call
setFont(...) on a specific object to override it.
You should now see two white zeros placed on the bottom!
We have the text objects added to the state, but right now they're static: they don't actually do anything. Let's change that.
Add the fields fields below, next to everything else above create():
- Java
- Kotlin
import org.flixelgdx.text.FlixelText;

private int playerScore = 0;
private int enemyScore = 0;
private FlixelText playerLabel;
private FlixelText enemyLabel;
Inside create():
playerLabel = new FlixelText(150, 20);
playerLabel.setText("0");
playerLabel.setTextSize(48);
add(playerLabel);

enemyLabel = new FlixelText(450, 20);
enemyLabel.setText("0");
enemyLabel.setTextSize(48);
add(enemyLabel);
When the ball leaves either side, update the score, refresh the label
text, and reset the ball to the center. Add this goal check at the
end of update(elapsed):
if (ball.getX() < 0) {
  enemyScore++;
  enemyLabel.setText(String.valueOf(enemyScore));
  resetBall(+1);
}
if (ball.getX() > Flixel.getViewWidth() - ball.getWidth()) {
  playerScore++;
  playerLabel.setText(String.valueOf(playerScore));
  resetBall(-1);
}
And a helper:
private void resetBall(int towardSign) {
  ball.setPosition(316, 236);
  ball.setVelocity(300f * towardSign, 180f);
  Flixel.info("Score! Player " + playerScore + " - " + enemyScore + " Enemy");
}
import org.flixelgdx.text.FlixelText

private var playerScore = 0
private var enemyScore = 0
private lateinit var playerLabel: FlixelText
private lateinit var enemyLabel: FlixelText
Inside create():
playerLabel = FlixelText(150f, 20f).apply {
  text = "0"
  textSize = 48
}
add(playerLabel)

enemyLabel = FlixelText(450f, 20f).apply {
  text = "0"
  textSize = 48
}
add(enemyLabel)
When the ball leaves either side, update the score, refresh the label
text, and reset the ball to the center. Add this goal check at the
end of update(elapsed):
if (ball.x < 0f) {
  enemyScore++
  enemyLabel.text = enemyScore.toString()
  resetBall(+1)
}
if (ball.x > Flixel.getViewWidth().toFloat() - ball.width) {
  playerScore++
  playerLabel.text = playerScore.toString()
  resetBall(-1)
}
And a helper:
private fun resetBall(towardSign: Int) {
  ball.setPosition(316f, 236f)
  ball.setVelocity(300f * towardSign, 180f)
  Flixel.info("Score! Player $playerScore - $enemyScore Enemy")
}
Notice the Flixel.info(...) call — that is the logging API in
action. Every score is now printed to the terminal and to the
framework's log file. We'll lean on it again in the next step to debug.
7. A pause substate
Finally, let's wire up a pause screen as a FlixelSubState. Press
SPACE to toggle pause; while paused, the gameplay freezes and a big
"PAUSED" label appears over the top.
Remember the commercial break analogy? That is exactly what a substate is. The current state stays mounted behind the substate, so when the substate closes everything continues from where it stopped.
Create a new file PauseSubState.java (or .kt) next to
PlayState:
- Java
- Kotlin
package com.example.pong;

import org.flixelgdx.Flixel;
import org.flixelgdx.FlixelSubState;
import org.flixelgdx.input.keyboard.FlixelKey;
import org.flixelgdx.text.FlixelText;

public class PauseSubState extends FlixelSubState {

  @Override
  public void create() {
    super.create();
    FlixelText label = new FlixelText(220, 200);
    label.setText("PAUSED");
    label.setTextSize(48);
    label.screenCenter();
    add(label);
  }

  @Override
  public void update(float elapsed) {
    super.update(elapsed);
    if (Flixel.keys.justPressed(FlixelKey.SPACE)) close();
  }
}
package com.example.pong

import org.flixelgdx.Flixel
import org.flixelgdx.FlixelSubState
import org.flixelgdx.input.keyboard.FlixelKey
import org.flixelgdx.text.FlixelText

class PauseSubState : FlixelSubState() {

  override fun create() {
    super.create()
    val label = FlixelText(220f, 200f).apply {
      text = "PAUSED"
      textSize = 48
      screenCenter()
    }
    add(label)
  }

  override fun update(elapsed: Float) {
    super.update(elapsed)
    if (Flixel.keys.justPressed(FlixelKey.SPACE)) close()
  }
}
Then, in PlayState.update, add this at the top:
- Java
- Kotlin
if (Flixel.keys.justPressed(FlixelKey.SPACE)) {
  openSubState(new PauseSubState());
  return; // Skip the rest of this frame.
}
if (Flixel.keys.justPressed(FlixelKey.SPACE)) {
  openSubState(PauseSubState())
  return // Skip the rest of this frame.
}
Run the game and tap SPACE. PAUSED freezes the field; tap SPACE again, the ball picks up exactly where it left off.
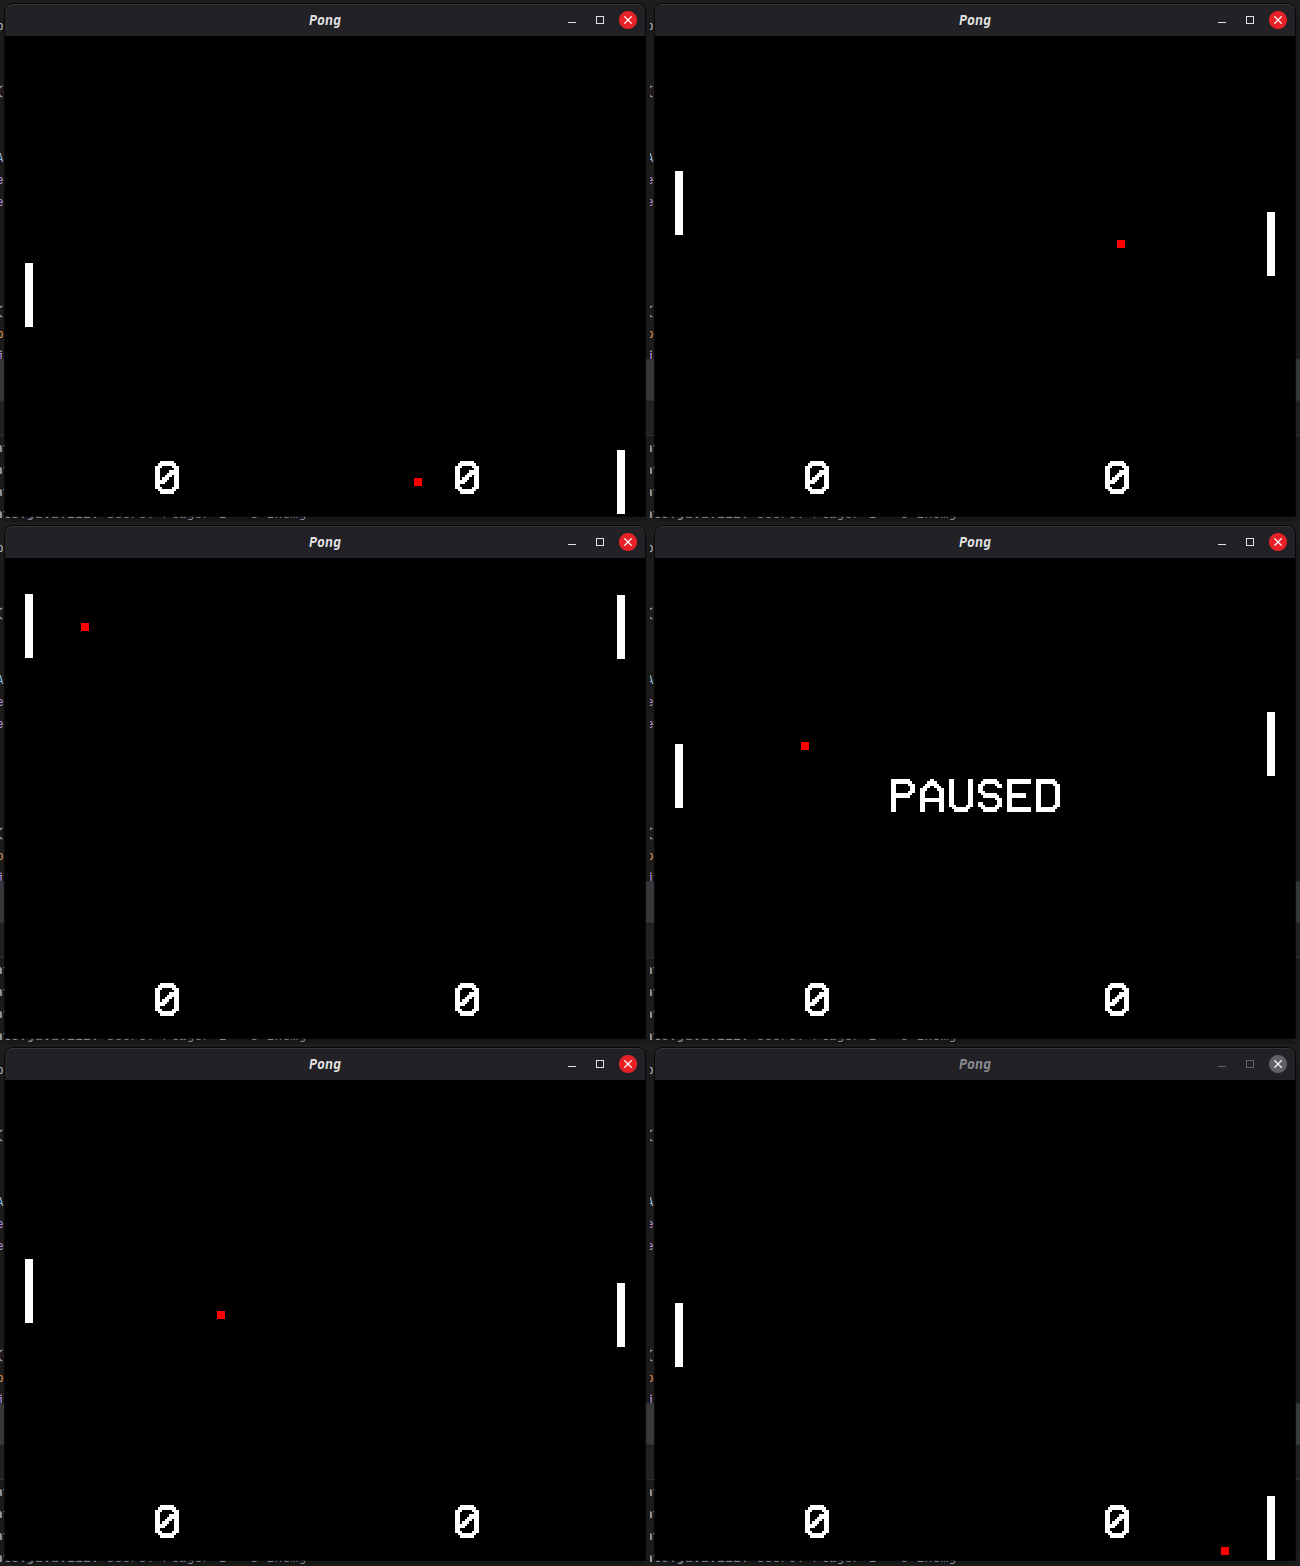
That right there — justPressed vs pressed, openSubState /
close() — is the whole input + state-stack story.
8. Game over → Flixel.switchState
For the cherry on top, when somebody reaches 5 points, we will switch states into a tiny "Game Over" screen, which sits there until the user presses ENTER to start again.
- Java
- Kotlin
package com.example.pong;

import org.flixelgdx.Flixel;
import org.flixelgdx.FlixelState;
import org.flixelgdx.input.keyboard.FlixelKey;
import org.flixelgdx.text.FlixelText;

public class GameOverState extends FlixelState {

  @Override
  public void create() {
    super.create();
    FlixelText label = new FlixelText(180, 200);
    label.setText("GAME OVER\nPress ENTER");
    label.setTextSize(36);
    label.setAlignment(FlixelText.Alignment.CENTER);
    label.screenCenter();
    add(label);
  }

  @Override
  public void update(float elapsed) {
    super.update(elapsed);
    if (Flixel.keys.justPressed(FlixelKey.ENTER)) {
      Flixel.switchState(new PlayState());
    }
  }
}
And in PlayState.resetBall():
if (playerScore >= 5 || enemyScore >= 5) {
  Flixel.info("Match over. Switching to GameOverState.");
  Flixel.switchState(new GameOverState());
}
package com.example.pong

import org.flixelgdx.Flixel
import org.flixelgdx.FlixelState
import org.flixelgdx.input.keyboard.FlixelKey
import org.flixelgdx.text.FlixelText

class GameOverState : FlixelState() {

  override fun create() {
    super.create()
    val label = FlixelText(180f, 200f).apply {
      text = "GAME OVER\nPress ENTER"
      textSize = 36
      alignment = FlixelText.Alignment.CENTER
      screenCenter()
    }
    add(label)
  }

  override fun update(elapsed: Float) {
    super.update(elapsed)
    if (Flixel.keys.justPressed(FlixelKey.ENTER)) {
      Flixel.switchState(PlayState())
    }
  }
}
And in PlayState.resetBall():
if (playerScore >= 5 || enemyScore >= 5) {
  Flixel.info("Match over. Switching to GameOverState.")
  Flixel.switchState(GameOverState())
}
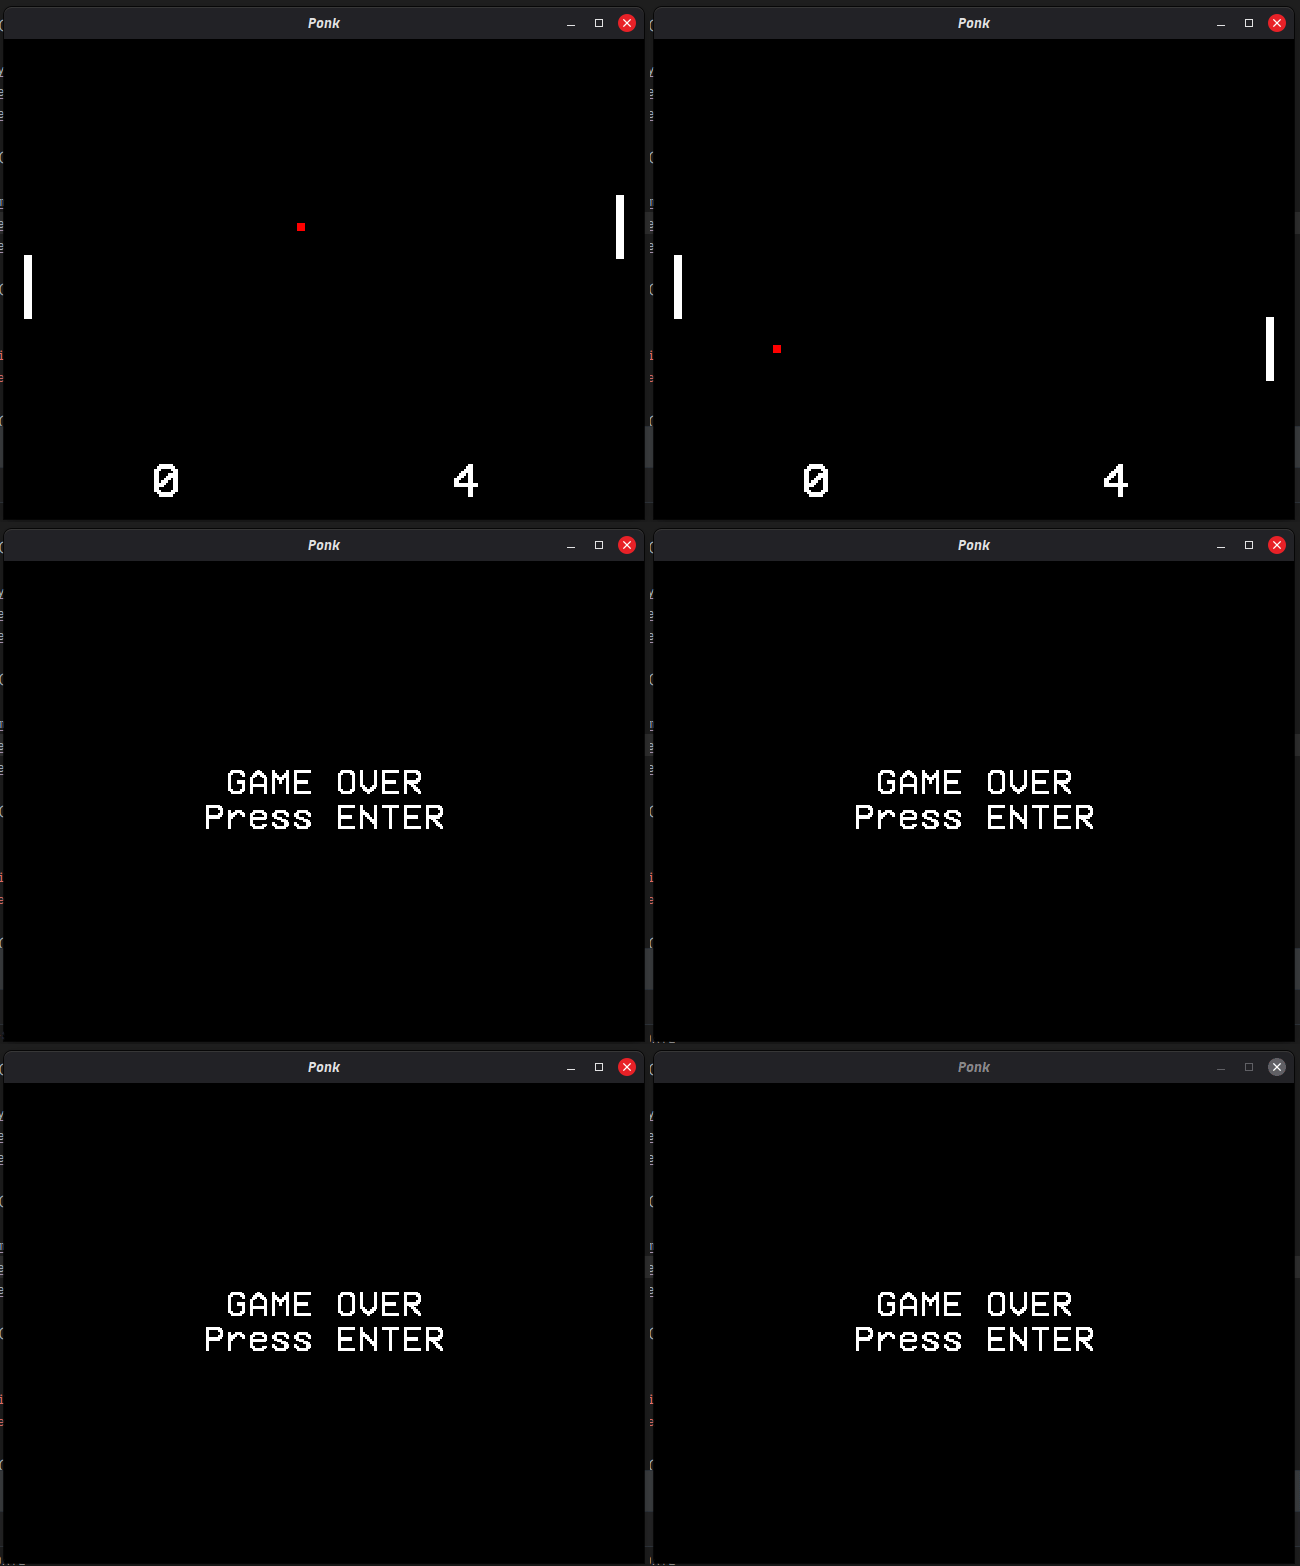
Congratulations, you just made your first game with FlixelGDX! 🎉
PlayState should lookShow the full file
- Java
- Kotlin
package com.example.pong;

import com.badlogic.gdx.Gdx;
import org.flixelgdx.Flixel;
import org.flixelgdx.FlixelSprite;
import org.flixelgdx.FlixelState;
import org.flixelgdx.input.keyboard.FlixelKey;
import org.flixelgdx.text.FlixelFontRegistry;
import org.flixelgdx.text.FlixelText;
import org.flixelgdx.util.FlixelColor;

public class PlayState extends FlixelState {

  private static final float PADDLE_SPEED = 220f;
  private static final float ENEMY_SPEED  = 160f;

  private FlixelSprite player;
  private FlixelSprite enemy;
  private FlixelSprite ball;
  private int playerScore = 0;
  private int enemyScore  = 0;
  private FlixelText playerLabel;
  private FlixelText enemyLabel;

  @Override
  public void create() {
    super.create();
    FlixelFontRegistry.register("vcr", Gdx.files.internal("fonts/vcr.ttf"));
    FlixelFontRegistry.setDefault("vcr");
    Flixel.info("Pong is starting!");

    player = new FlixelSprite(20, 200);
    player.makeGraphic(8, 64, FlixelColor.WHITE);
    add(player);

    enemy = new FlixelSprite(612, 200);
    enemy.makeGraphic(8, 64, FlixelColor.WHITE);
    add(enemy);

    ball = new FlixelSprite(316, 236);
    ball.makeGraphic(8, 8, FlixelColor.RED);
    ball.setVelocity(300f, 180f);
    add(ball);

    playerLabel = new FlixelText(150, 20, 200, "0");
    playerLabel.setTextSize(48);
    add(playerLabel);

    enemyLabel = new FlixelText(450, 20, 200, "0");
    enemyLabel.setTextSize(48);
    add(enemyLabel);
  }

  @Override
  public void update(float elapsed) {
    super.update(elapsed);

    if (Flixel.keys.justPressed(FlixelKey.SPACE)) {
      openSubState(new PauseSubState());
      return;
    }

    if (Flixel.keys.pressed(FlixelKey.W)) player.changeY(PADDLE_SPEED * elapsed);
    if (Flixel.keys.pressed(FlixelKey.S)) player.changeY(-PADDLE_SPEED * elapsed);
    if (player.getY() < 0) player.setY(0);
    if (player.getY() > Flixel.getViewHeight() - player.getHeight()) player.setY(Flixel.getViewHeight() - player.getHeight());

    if (ball.getY() < 0) {
      ball.setY(0);
      ball.setVelocityY(-ball.getVelocityY());
    }
    if (ball.getY() > Flixel.getViewHeight() - ball.getHeight()) {
      ball.setY(Flixel.getViewHeight() - ball.getHeight());
      ball.setVelocityY(-ball.getVelocityY());
    }

    if (Flixel.overlap(ball, player) && ball.getVelocityX() < 0) ball.setVelocityX(-ball.getVelocityX());
    if (Flixel.overlap(ball, enemy)  && ball.getVelocityX() > 0) ball.setVelocityX(-ball.getVelocityX());

    float targetY = ball.getY() - 28;
    if (enemy.getY() < targetY) enemy.changeY(Math.min(ENEMY_SPEED * elapsed, targetY - enemy.getY()));
    if (enemy.getY() > targetY) enemy.changeY(-Math.min(ENEMY_SPEED * elapsed, enemy.getY() - targetY));
    if (enemy.getY() < 0) enemy.setY(0);
    if (enemy.getY() > Flixel.getViewHeight() - enemy.getHeight()) enemy.setY(Flixel.getViewHeight() - enemy.getHeight());

    if (ball.getX() < 0) {
      enemyScore++;
      enemyLabel.setText(String.valueOf(enemyScore));
      resetBall(+1);
    }
    if (ball.getX() > Flixel.getViewWidth() - ball.getWidth()) {
      playerScore++;
      playerLabel.setText(String.valueOf(playerScore));
      resetBall(-1);
    }
  }

  private void resetBall(int towardSign) {
    ball.setPosition(316, 236);
    ball.setVelocity(300f * towardSign, 180f);
    Flixel.info("Score! Player " + playerScore + " - " + enemyScore + " Enemy");

    if (playerScore >= 5 || enemyScore >= 5) {
      Flixel.info("Match over. Switching to GameOverState.");
      Flixel.switchState(new GameOverState());
    }
  }
}
package com.example.pong

import com.badlogic.gdx.Gdx
import org.flixelgdx.Flixel
import org.flixelgdx.FlixelSprite
import org.flixelgdx.FlixelState
import org.flixelgdx.input.keyboard.FlixelKey
import org.flixelgdx.text.FlixelFontRegistry
import org.flixelgdx.text.FlixelText
import org.flixelgdx.util.FlixelColor

class PlayState : FlixelState() {

  companion object {
    private const val PADDLE_SPEED = 220f
    private const val ENEMY_SPEED  = 160f
  }

  private lateinit var player: FlixelSprite
  private lateinit var enemy: FlixelSprite
  private lateinit var ball: FlixelSprite
  private var playerScore = 0
  private var enemyScore  = 0
  private lateinit var playerLabel: FlixelText
  private lateinit var enemyLabel: FlixelText

  override fun create() {
    super.create()
    Flixel.info("Pong is starting!")

    FlixelFontRegistry.register("vcr", Gdx.files.internal("fonts/vcr.ttf"))
    FlixelFontRegistry.setDefault("vcr")

    player = FlixelSprite(20f, 200f).apply {
      makeGraphic(8, 64, FlixelColor.WHITE)
    }
    add(player)

    enemy = FlixelSprite(612f, 200f).apply {
      makeGraphic(8, 64, FlixelColor.WHITE)
    }
    add(enemy)

    ball = FlixelSprite(316f, 236f).apply {
      makeGraphic(8, 8, FlixelColor.RED)
      setVelocity(300f, 180f)
    }
    add(ball)

    playerLabel = FlixelText(150f, 20f).apply {
      text = "0"
      textSize = 48
    }
    add(playerLabel)

    enemyLabel = FlixelText(450f, 20f).apply {
      text = "0"
      textSize = 48
    }
    add(enemyLabel)
  }

  override fun update(elapsed: Float) {
    super.update(elapsed)

    if (Flixel.keys.justPressed(FlixelKey.SPACE)) {
      openSubState(PauseSubState())
      return
    }

    if (Flixel.keys.pressed(FlixelKey.W)) player.y += PADDLE_SPEED * elapsed
    if (Flixel.keys.pressed(FlixelKey.S)) player.y -= PADDLE_SPEED * elapsed
    if (player.y < 0f) player.y = 0f
    if (player.y > Flixel.getViewHeight().toFloat() - player.height) player.y = Flixel.getViewHeight().toFloat() - player.height

    if (ball.y < 0f) {
      ball.y = 0f
      ball.velocityY = -ball.velocityY
    }
    if (ball.y > Flixel.getViewHeight().toFloat() - ball.height) {
      ball.y = Flixel.getViewHeight().toFloat() - ball.height
      ball.velocityY = -ball.velocityY
    }

    if (Flixel.overlap(ball, player) && ball.velocityX < 0) ball.velocityX = -ball.velocityX
    if (Flixel.overlap(ball, enemy)  && ball.velocityX > 0) ball.velocityX = -ball.velocityX

    val targetY = ball.y - 28f
    if (enemy.y < targetY) enemy.y += minOf(ENEMY_SPEED * elapsed, targetY - enemy.y)
    if (enemy.y > targetY) enemy.y -= minOf(ENEMY_SPEED * elapsed, enemy.y - targetY)
    if (enemy.y < 0f) enemy.y = 0f
    if (enemy.y > Flixel.getViewHeight().toFloat() - enemy.height) enemy.y = Flixel.getViewHeight().toFloat() - enemy.height

    if (ball.x < 0f) {
      enemyScore++
      enemyLabel.setText(enemyScore.toString())
      resetBall(+1)
    }
    if (ball.x > Flixel.getViewWidth().toFloat() - ball.width) {
      playerScore++
      playerLabel.setText(playerScore.toString())
      resetBall(-1)
    }
  }

  private fun resetBall(towardSign: Int) {
    ball.setPosition(316f, 236f)
    ball.setVelocity(300f * towardSign, 180f)
    Flixel.info("Score! Player $playerScore - $enemyScore Enemy")

    if (playerScore >= 5 || enemyScore >= 5) {
      Flixel.info("Match over. Switching to GameOverState.")
      Flixel.switchState(GameOverState())
    }
  }
}
What you learned
Take a breath. In one afternoon you used:
FlixelGame+FlixelStatefor the main loop.FlixelSubStatefor the pause overlay.FlixelSprite+makeGraphicfor everything you can see.Flixel.overlap(a, b)for AABB collision — the same static helper works for single objects and groups.Flixel.keys(pressed,justPressed) andFlixelKeyfor input.- The delta time pattern (
speed * elapsed) so the game runs the same on every machine. FlixelTextfor HUD text, withFlixelFontRegistryto load and share a custom.ttffont.FlixelColorfor framework-native color constants likeFlixelColor.WHITEandFlixelColor.RED.- Logging for friendly debug output.
Flixel.switchStateto swap scenes.
Those are the same building blocks every FlixelGDX game uses, from 3-day jam entries to full-fat indie titles.
Where next?
- Open the API reference and look up the real classes you
just touched —
FlixelSprite,FlixelText,Flixel,FlixelKey,FlixelObject. - Try replacing your
makeGraphicrectangles with images you load throughloadGraphic. - Add a sound effect on every paddle bounce using
Flixel.sound.play.
Welcome to FlixelGDX. Now go make something amazing. ❤️